
A child safety seat is essential when you’re traveling in a vehicle with your kid. Just as important as picking the right seat is ensuring you’ve properly installed it. With so many seats to choose from depending on your child’s age (and that mysterious system called “LATCH” thrown in), setting a safety seat up right can feel impossible sometimes. Crème de la Crème put together this guide to give you confidence when you’re installing your child’s safety seat.
All About LATCH
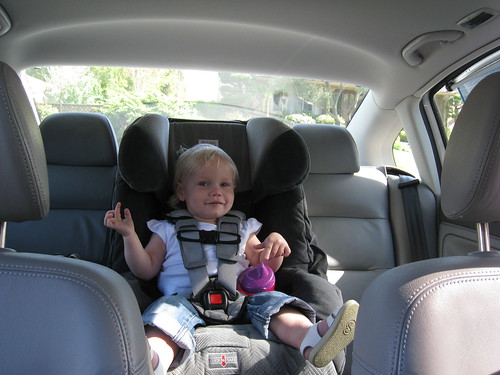
“Front facing car seat” licensed under CC BY 2.0 via Flickr by Dan Harrelson
So, exactly what is the LATCH system? The acronym means Lower Anchors and Tethers for Children. The system of built-in hooks and straps was designed to make installing car seats easier, and just about every infant, convertible, and forward-facing car seat as well as vehicles manufactured after September 1, 2002 has the system. An estimated three out of four car seats are not installed correctly, so it’s important for every parent and caregiver to understand how LATCH works.
Here’s how to decipher the different parts of the LATCH restraint system:
- Lower anchors: The lower anchors are small bars in the space in between the back of the rear seat and the seat cushions. Use these to install forward- and rear-facing car seats.
- Lower anchor strap: You’ll find this strap attached to the bottom of a car seat. The strap includes two hooks or buckles, with one on either side of the seat.
- Top tether anchors: These are metal loops. You might find them on the shelf area, close to the rear mirror, of a sedan. If you have a minivan or SUV, look on the floor or ceiling, under the seat, or on the back of the seat, as placement can vary.
- Top tether strap: This strap will come from the car seat’s top. It includes a buckle or hook at its end.
Installing Infant and Toddler Child Safety Seats
You should make sure your child has a rear-facing child safety seat from birth until they reach the rear-facing seat’s height and weight limits. When you’re ready to install the safety seat, you’ll want to either use the seat belt or the LATCH lower anchors, but not both. You might think using both will keep your child doubly safe, but you’ll find that most manuals say this hasn’t been tested and shouldn’t be done.
Start with the safety seat in the rear-center position. The center of your vehicle’s back seat provides the safest spot for your child. However, your vehicle may only have LATCH connections for side seats. You can use the center seat belt for an option that’s still safe, but sometimes not as easy to use. You might also put the seat in the middle but borrow LATCH anchors from both sides if your vehicle allows it. However, this workaround won’t allow for installing another restraint in the same row if you have more than one kid.
Keep in mind that you want the safety seat where you can get the tightest fit. A tighter fit on the side is better than a bad fit with the safety seat positioned in the center. The safety seat shouldn’t move more than an inch from front to back or side to side.
Once you have the seat in the tightest spot, lock the seat belt in position. Ensure you pull the seat belt out all the way to get it in locking mode if you use a seat belt in place of the lower anchors. Look to the owner manual for your vehicle for help with this step.
Finally, position your child. You’ll want the harness straps to be snug, with the chest clip at the level of your child’s armpits to ensure the straps don’t slide off their shoulders.
Installing Child Safety Seats for Preschoolers
You should only switch your child to a forward-facing seat with a harness when they reach the upper height or weight limit of their rear-facing seat. Then, keep them in this new seat until they again reach the new seat’s height restriction or weight limit.
Make sure you use the top tether when installing a forward-facing safety seat, no matter if you use the seat belt or lower anchors. The top tether keeps the seat from moving forward and cuts down on the risk of head injuries. The tether anchor can feel challenging to find, so carefully look for the right connection. You can easily attach the tether to a cargo loop or another wrong hardware piece if you’re not careful. To position your child correctly in a forward-facing seat, thread the harness straps through the slots at or above the shoulder position.
Installing Booster Seats
You can move to a booster seat once your kid outgrows the upper height or weight limit of their forward-facing harness seat. Your child can sit in a belt-positioned booster seat until they reach 4 feet, 9 inches. Kids can typically use booster seats until they’re between 8 and 12 years old.
Choosing the right booster seat for your child’s needs is key. A high-back booster will offer more protection for side impacts, especially if your child is on the smaller side. High-back boosters also position children better. (That’s particularly helpful when your kid falls asleep.) These boosters are also better for vehicles that don’t have head restraints.
When your child is sitting in the boost seat, both the shoulder and lap of the seat belt need to be in the proper position to make sure your child stays protected. The shoulder belt should sit across the breastbone and collarbone — make sure your child doesn’t tuck it under their arm or behind their back. The lap belt should lie on the lower part of their pelvis.
Many booster seats have LATCH connections that keep them secure even when no one is sitting in them. If your booster doesn’t have these connections, you should buckle it in even if your kid isn’t in the car to keep the booster from becoming a projectile in a crash.That concludes Crème de la Crème’s guide to properly installing a safety seat for your child. Do you have any additional tips for caregivers installing a safety seat for the first time? Reach out to us so we can share your advice!